# Autograde Basics
This page will go through an example project and show you how to use Autograde as a student.
# The project page

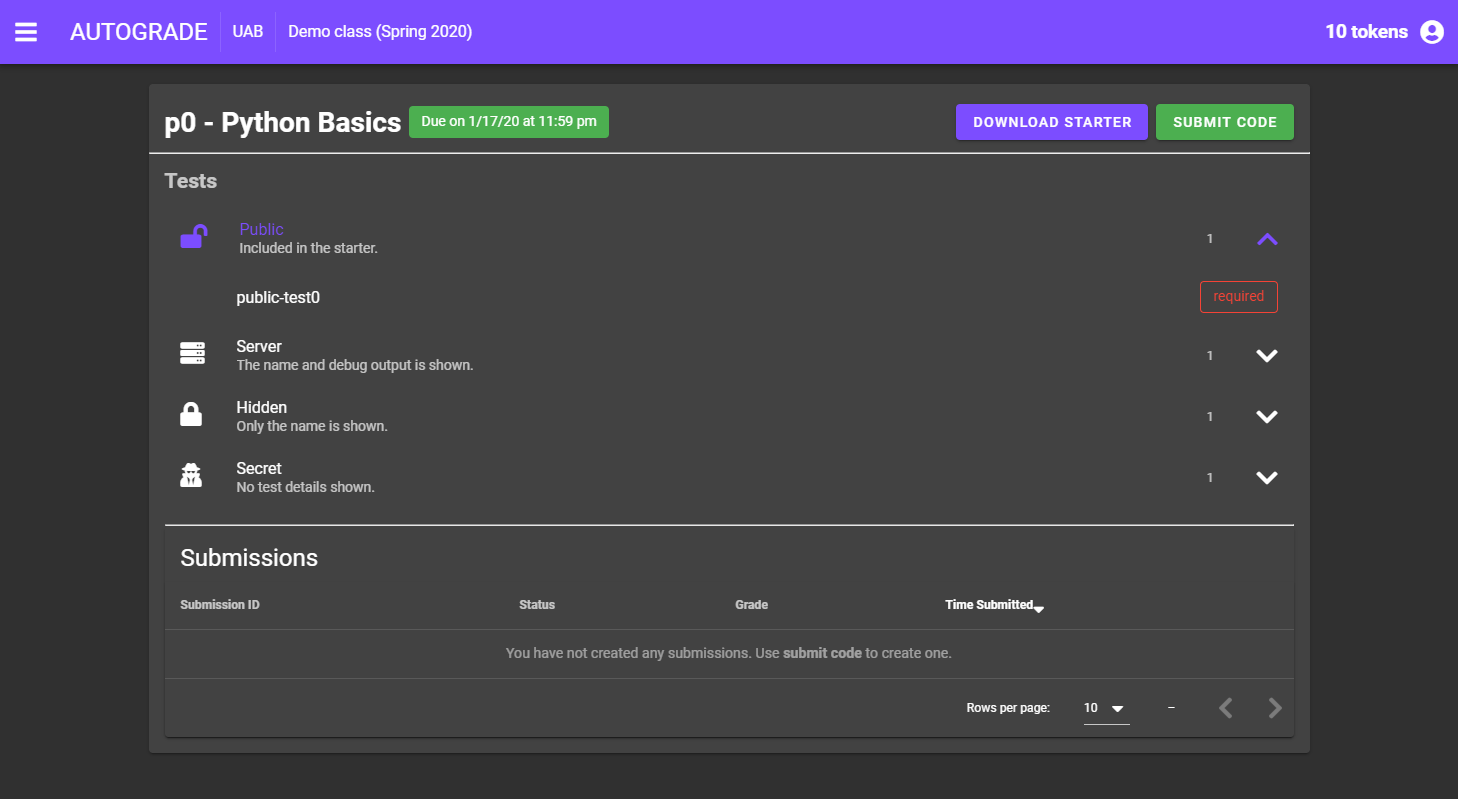
Within the project page, there are several components of information that will prove useful when using the system.
In the tests section, you can see the various project specific tests that will be used to grade submissions. In this example project, there is one of each type of test, and they are all required. The four test types are the following:
- Public: included in the starter.
- Server: the name and debug output is shown.
- Hidden: on the name is shown.
- Secret: no test details are shown.
The submission section will show all of your submissions for the project. You can create submissions using the SUBMIT CODE button at the top of the screen. But before that, we will need the starter code.
# Downloading the starter code
To download the starter code, use the DOWNLOAD STARTER button. There are currently two ways to download starter code: git and file downloads. In this tutorial, we will use the git method.
# Using GIT
Autograde uses a local git server with its own domain to serve repositories where you can commit your code and easily submit it. When you initialize the repo, it will give you a link to the repo that you can git clone and modify on your local system.
# The starter code
At its base level, the the starter consists of the following:
- Assignment code: the assignment that needs to be done.
tester.py: the file that helps you test you code.test/folder: the folder that holds all of the tests.
For this project, the starter contents is as follows:
.
├── p0.py
├── test
│   └── public-test0
│       ├── driver.py
│       └── test.py
└── tester.py

2 directories, 4 files
It is strongly advised to look through the tests as you go through the assignment. You can find the test code in each test directory in the test.py file (or whatever file the driver is trying to run).
# Implementing the answer
For us, the assignment code lies within p0.py:
#!/usr/bin/python3
#
# Project 0


# I *first last* have written all of this project myself, without any
# unauthorized assistance, and have followed the academic honor code.


### Modify code below.


def add(a, b):
    """Adds two numbers"""
    pass


def subtract(a, b):
    """Subtracts two numbers"""
    pass


def divide(a, b):
    """Divides two numbers"""
    pass


def multiply(a, b):
    """Multiplies two numbers"""
    pass
And below is a half wrong solution to the problem (add and subtract are switched):
def add(a, b):
    """Adds two numbers"""
    # intentional issue
    print(f"subtracting {a} and {b}: {a-b}")
    return a - b


def subtract(a, b):
    """Subtracts two numbers"""
    # intentional issue
    print(f"adding {a} and {b}: {a+b}")
    return a + b


def divide(a, b):
    """Divides two numbers"""
    print(f"dividing {a} and {b}: {a/b}")
    return a / b


def multiply(a, b):
    """Multiplies two numbers"""
    print(f"multiplying {a} and {b}: {a*b}")
    return a * b
# Testing the code
With our solution implemented, we can now test our code with the tester.py. The tester has a couple of arguments to help us customize our testing experience:
  -h, --help            show this help message and exit
  --list, -l            List available tests
  --all, -a             Perform all tests
  --verbose, -v         View test stdout, verbose output
  --test TEST, -t TEST  Perform a specific testname (case sensitive)
Since there is only one public test, we are going to run ./tester.py -a (or python tester.py -a depending on your cmd).
---------------------

Running test: public-test0
                FAILED

===========================
Summary: 0 / 1 tests passed
===========================
It failed. Luckily, we put debug statements with our logic in the code. Running ./tester.py -t public-test0 -v, we can debug our solution straight from the test by enabling verbose (-v).
---------------------

Running test: public-test0


STDOUT:
subtracting 1 and 1: 0

                FAILED
Well okay, we accidentally subtracted when we should've added. Easy fix.
---------------------

Running test: public-test0
        PASSED
Now that all our public tests are passed, we want to submit our assignment to the server for grading.
WARNING
Looking through the test/ directory will help you figure out what each test wants. You can also write your own tests to test even more parts of your code.
# Submitting your assignment
Since we are using git, we will git add our edited files and git commit and git push our solution to the server. Keep in mind that the credentials it wants is the same credentials you use to log into Autograde.
WARNING
If you are using file upload, be sure to tar up the solution from the ROOT directory. For example, go into the folder with the tester.py, and perform the command tar zcvf p0.tar.gz * (linux/mac). If you don't, it will complain that you are missing files when you try to submit.
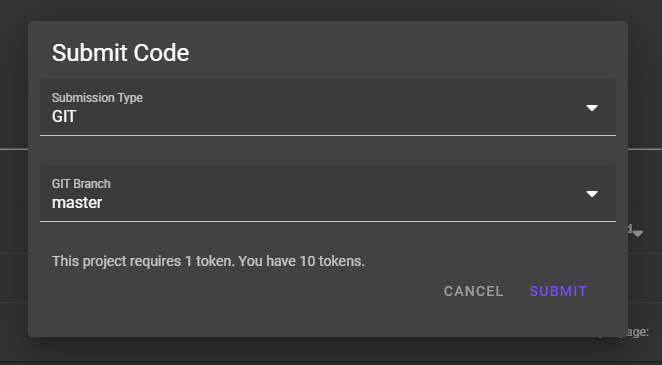
We can verify that our commit was successful on the project page by looking at the new git card at the bottom of the page. Now, it's time to submit our code. Using the SUBMIT CODE button, we will choose Submission Type GIT and GIT Branch master.

Submitting the assignment here will consume the designated token amount and process your assignment in the submission table instantly. Once the submission is labeled as done, we can open it up by clicking on it and see our results.

# Checking your submission
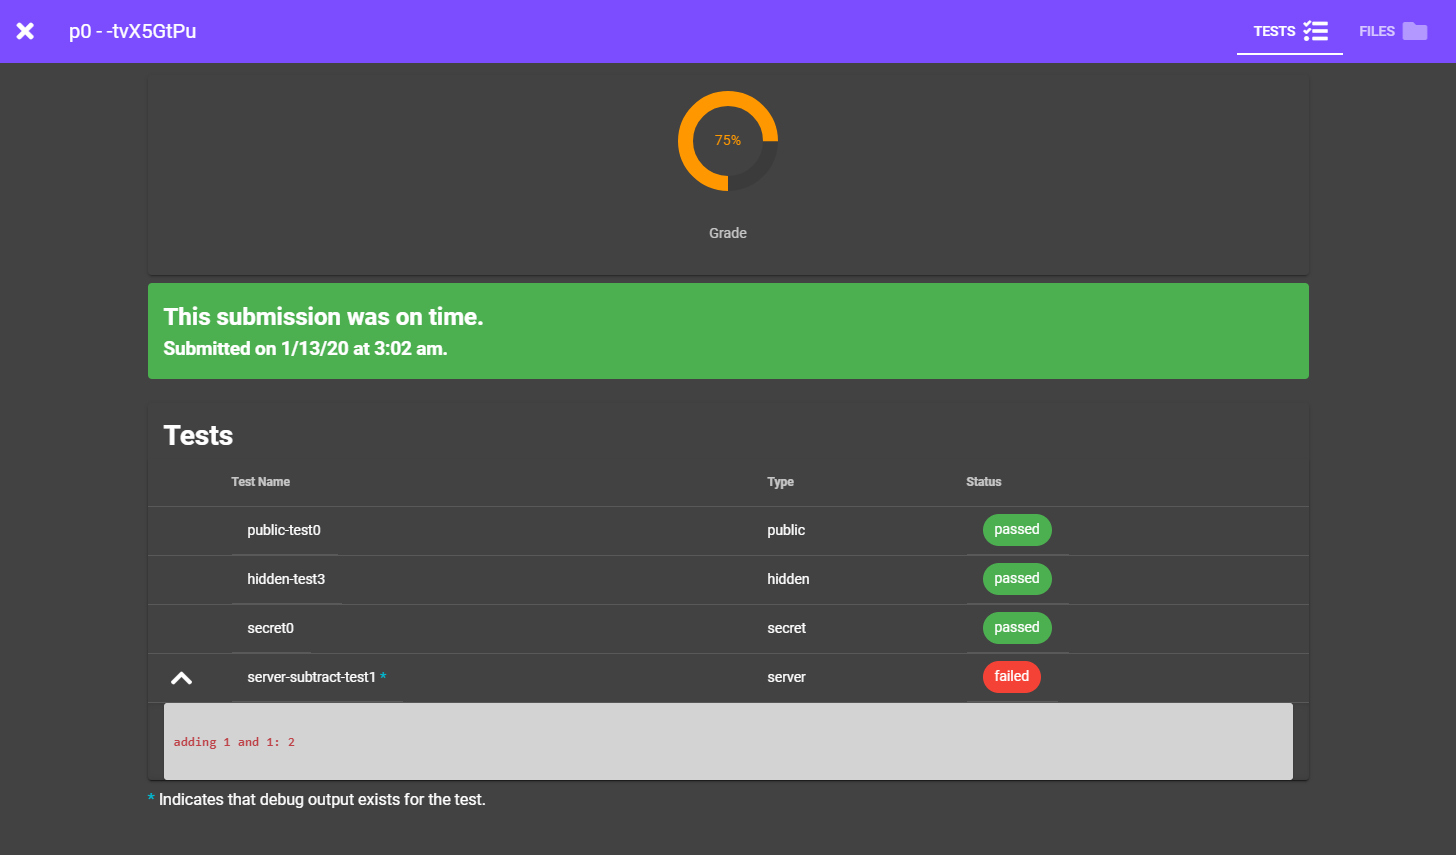
For us, one test failed and gave us a 75%. Luckily, it was a server test with a hint name and it will show us debug output when clicked on.

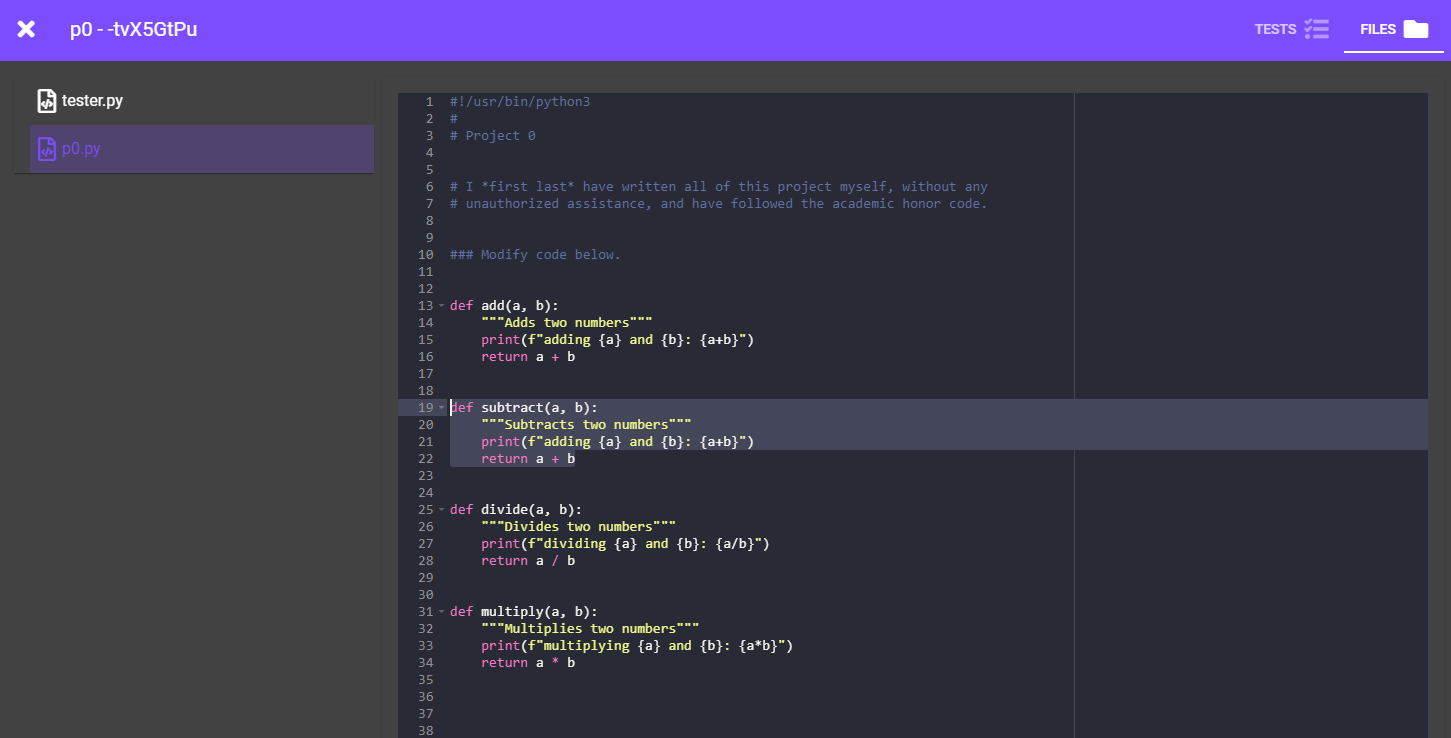
According to the debug output, we accidentally added when we were supposed to subtract. We can verify this in the files tab on the same page as well.

Well okay, easy fix again.

And... all done! Now our main page shows we have a 100% too.